You will love this classic cheesecake that can be decorated with berries for a special occasion such as the 4th of July or simply piled high with fresh berries for a summer birthday or gathering. Featuring an easy homemade crust and classic filling, this summer berry cheesecake recipe will be the talk of the party.
Jump to Recipe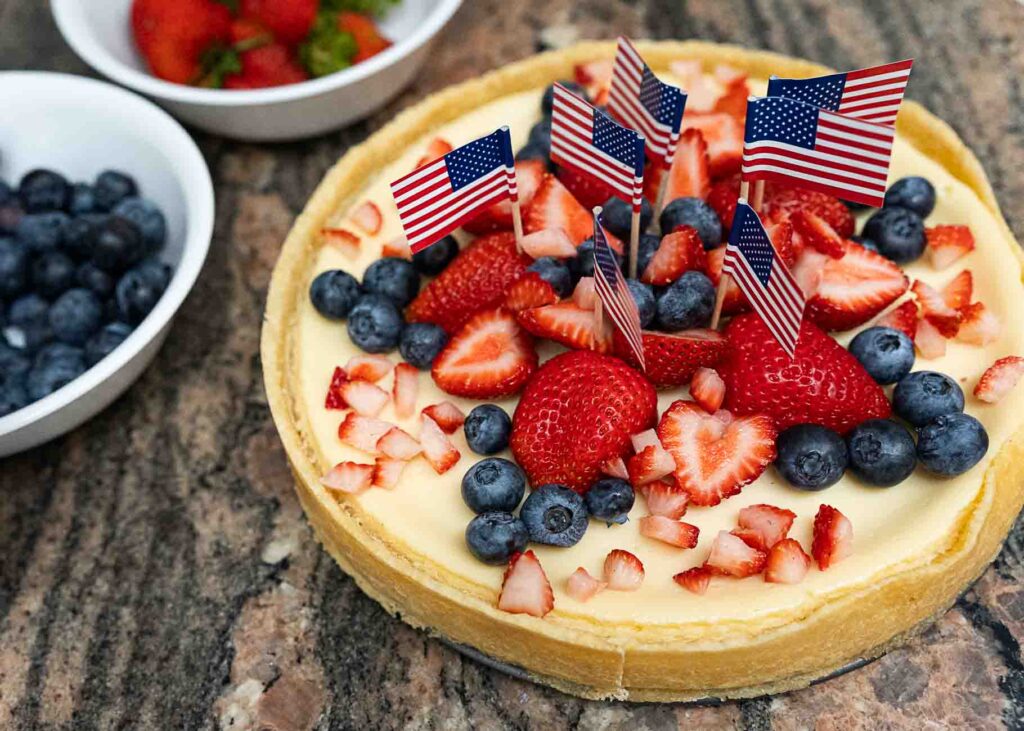
This easy cheesecake recipe is made without a graham cracker crust and instead features an easy-to-make crust similar to shortbread cookies. It also has no sour cream – just a simple but delicious cream cheese filling.
I’ve been bringing this cheesecake to our church Memorial Day gathering for several years now, and it always disappears in minutes. I had to start bringing two because they went so fast!
This is a great dessert recipe to make two at a time in the oven! It’s worth having 2 springform pans. This cheesecake does not require a water bath. Just a lower, longer bake that keeps the top from cracking.
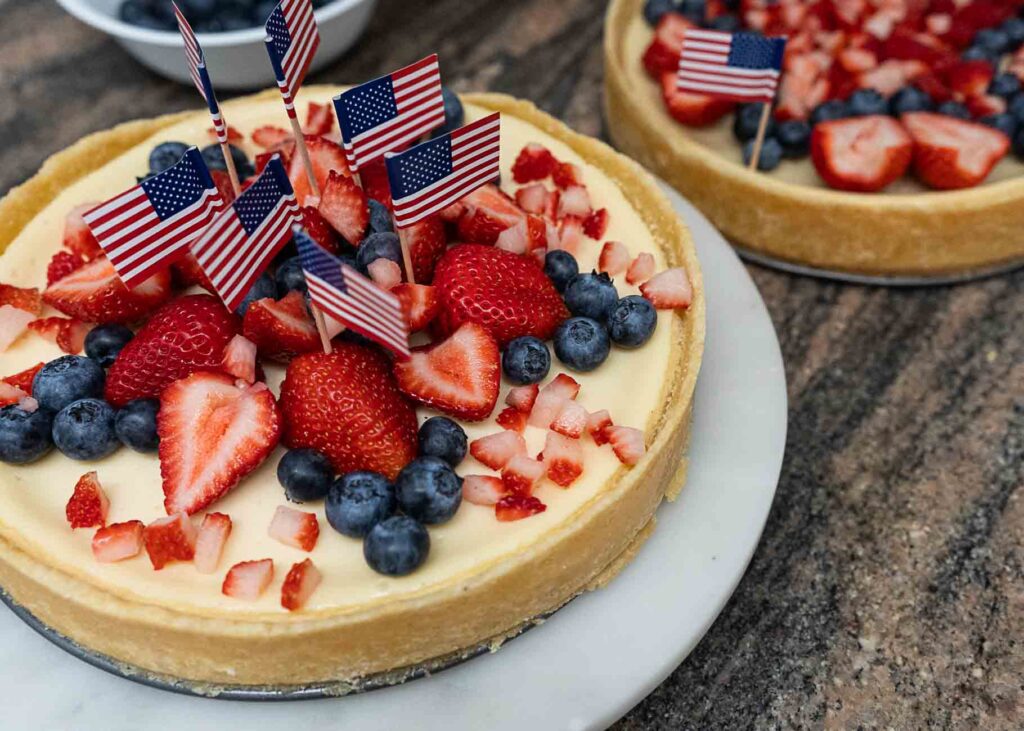
This summer berry cheesecake recipe can be decorated in so many ways, with any type of berries or fruit! Have a little fun with it and get creative. I had fun adding these American flag toothpicks for an extra decoration.
Why You’ll Love this Recipe
- It’s a perfect classic cheesecake recipe to use as a base for any flavor or decoration
- A great crowd pleaser for BBQs, potlucks, or even birthdays
- The perfect make-ahead dessert recipe!
Tools You Will Need
- A 9″ Springform Pan
- Stand Mixer
- Mixing Bowls
How to Make the Summer Berry Cheesecake (Step by Step)

Make the Cheesecake Crust:
Preheat the oven to 350 degrees F.
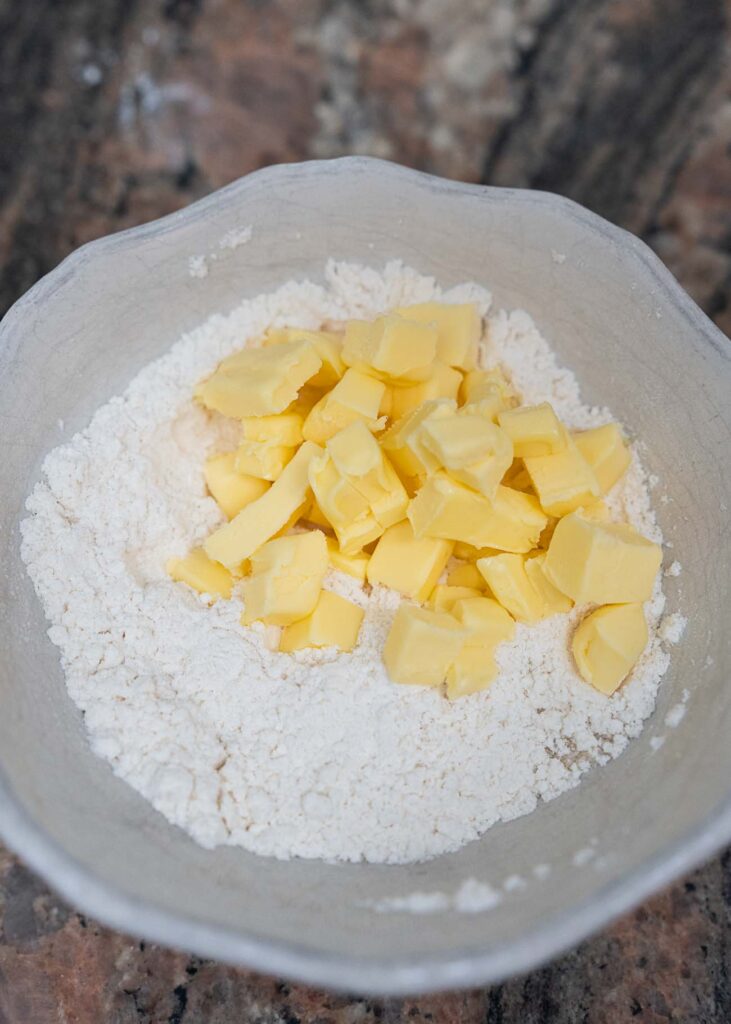
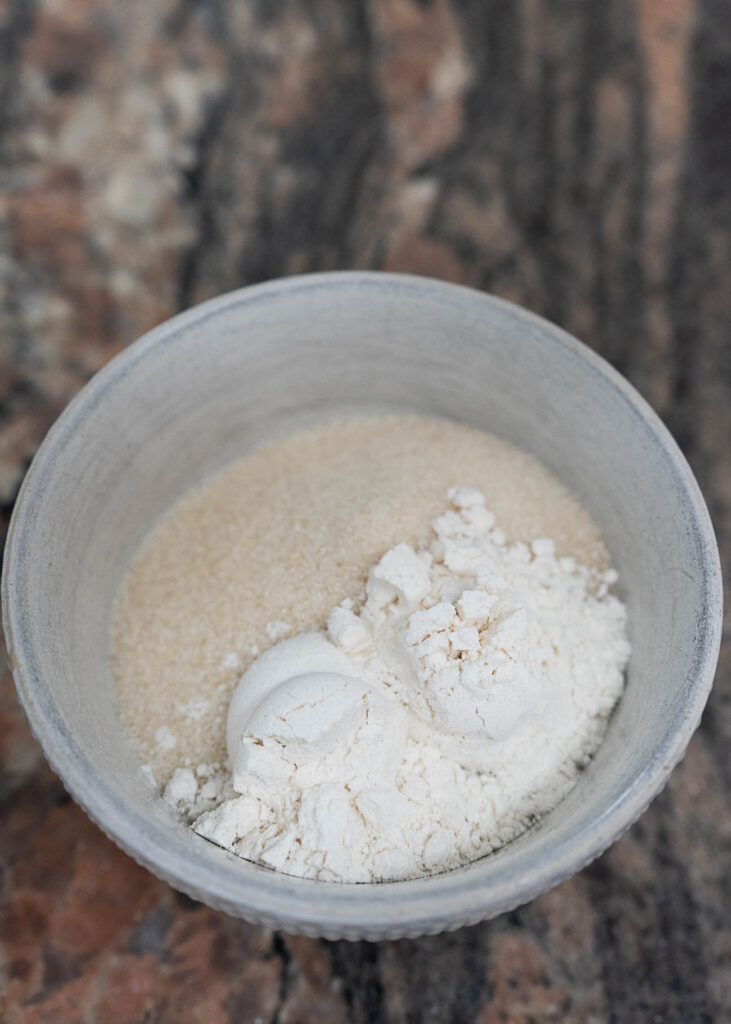
In a small bowl, combine the flour, sugar, and lemon zest.
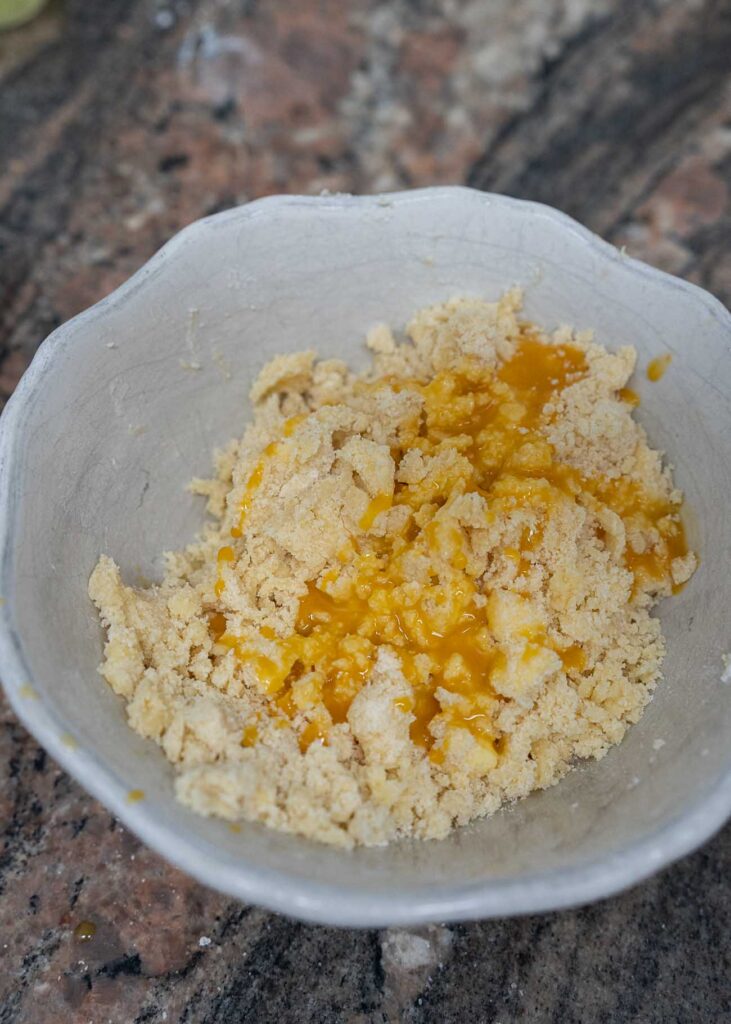
Cut the butter into small cubes and add it to the flour mixture. Using your fingers or a pastry cutter, work in the butter and curmble the mixture until even crumbs form.
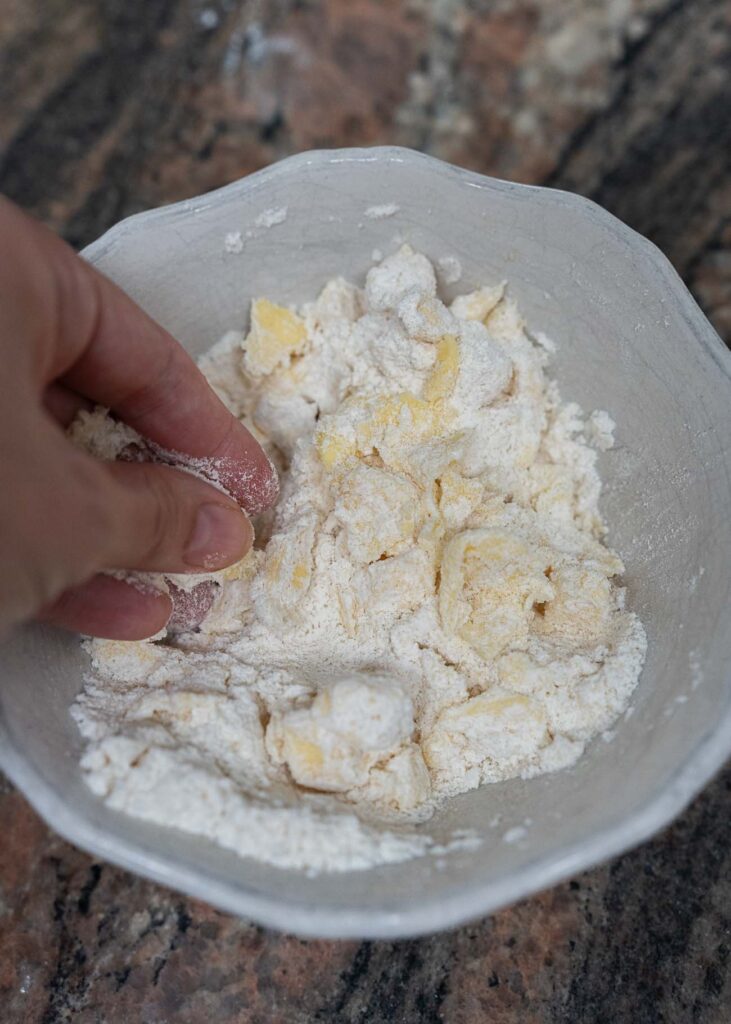
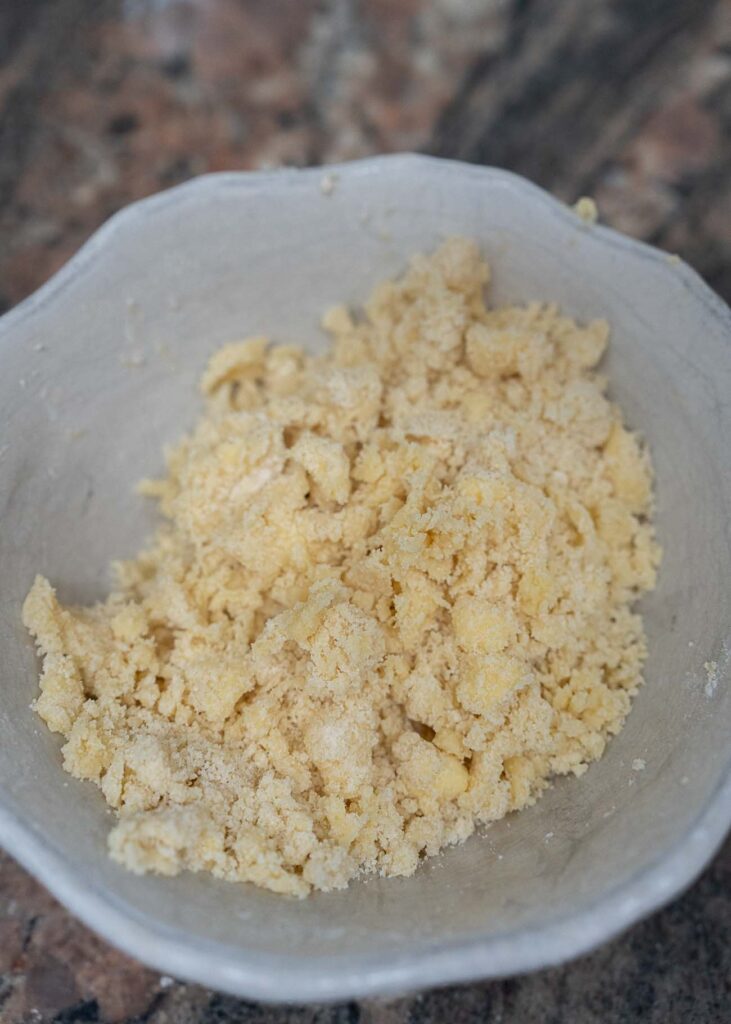
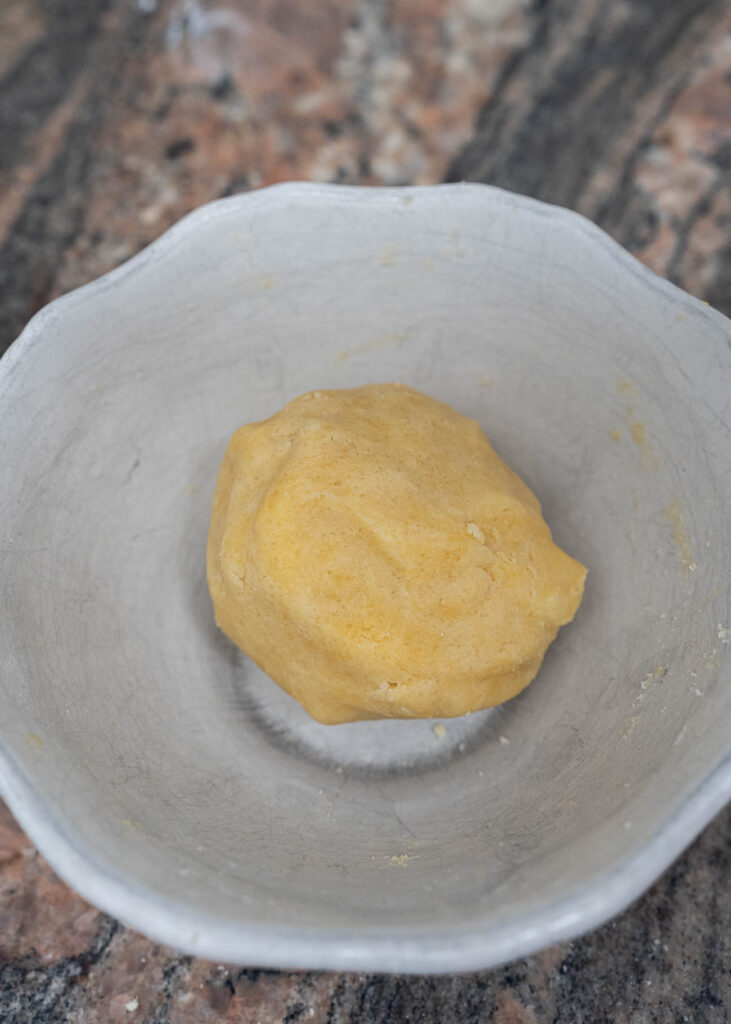
Add the lightly beaten egg yolk and the vanilla. Stir it together, and then use your hands to gather it into a ball.
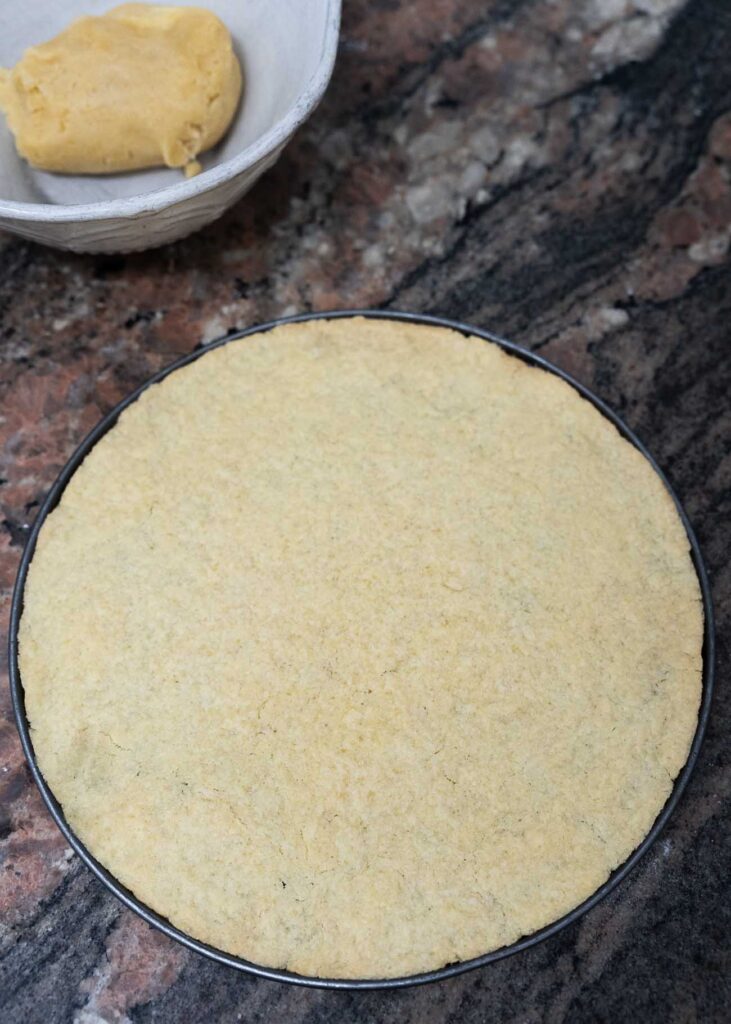
Take 1/3 of the dough, and begin pressing it in a thin, even layer on the bottom of the springform pan (leave the sides of the pan off for now).
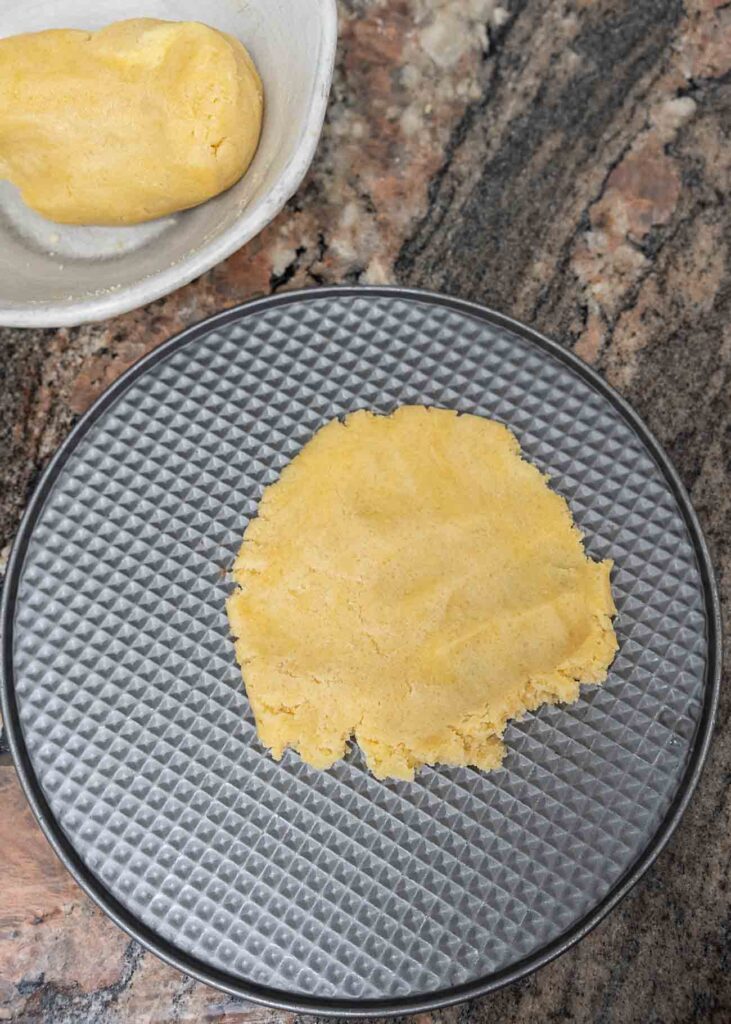
You may need to use slightly more than 1/3 of the dough, but it will be a thin and almost a slightly translucent layer when it is ready.
Place the bottom crust in the oven and bake for 7 minutes.
After 7 minutes, remove from the oven and set aside on a wire rack to cool.
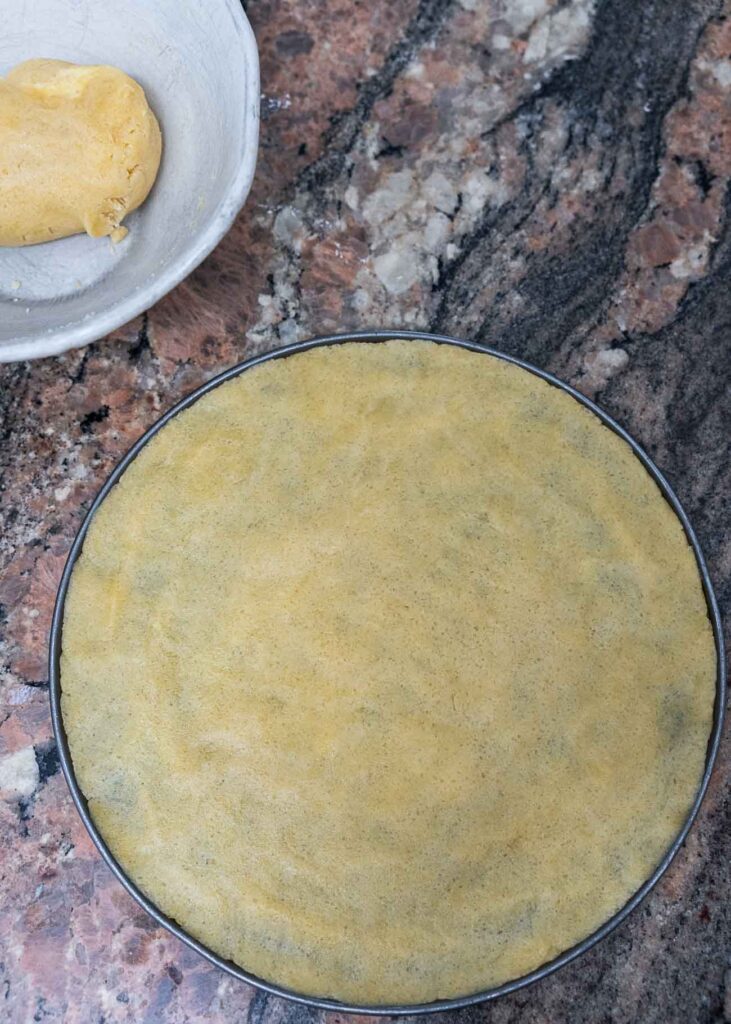
Once the bottom crust has cooled, put the sides of the springform pan on, and prepare the sides of the crust.
First, shape the dough into rough logs and place them evenly around the pan.
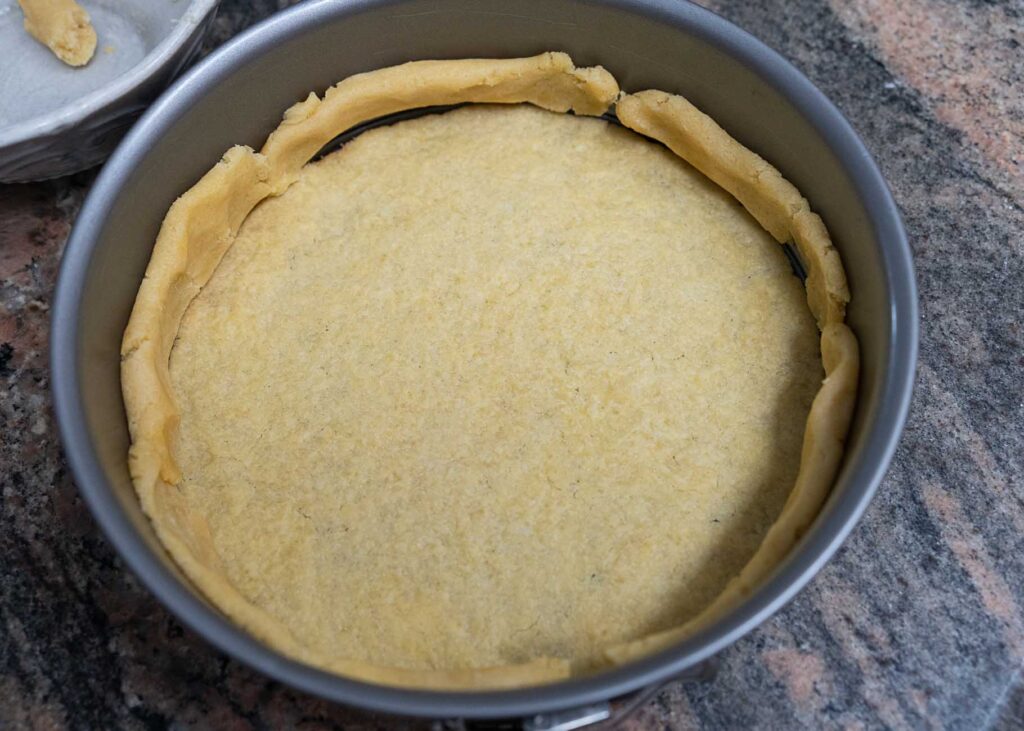
Then, use your fingers to press the dough evenly up the sides of the pan 1-1.5 inches high. It should meet the bottom crust lightly to seal the edge.

Take your time on this, pressing it evenly along the sides of the pan.
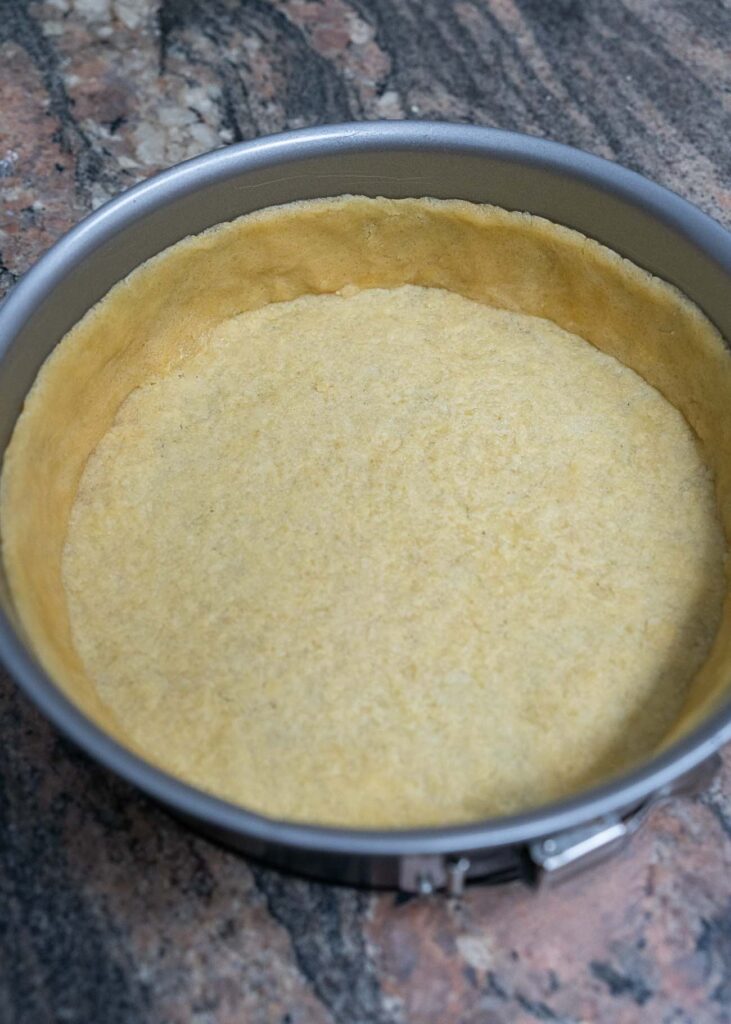
Once it is nice and even all around, it’s time to make the filling. (Note, you do not prebake the sides.)
Set the prepared crust aside while you prep the cheesecake filling.
How to Make the Cheesecake Filling:
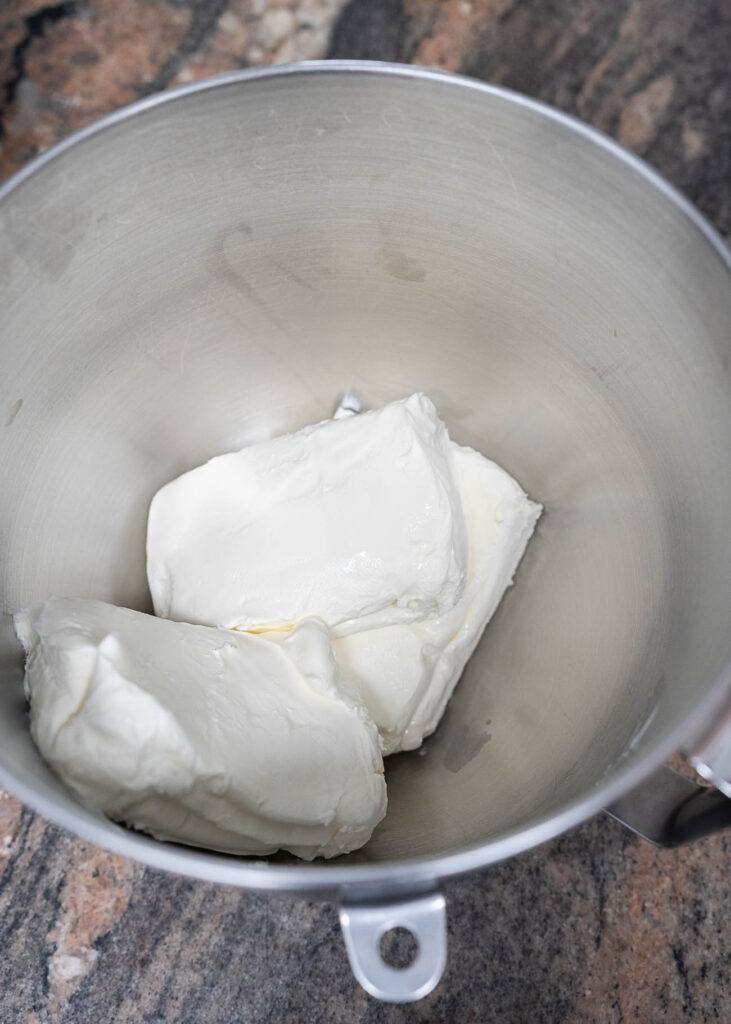
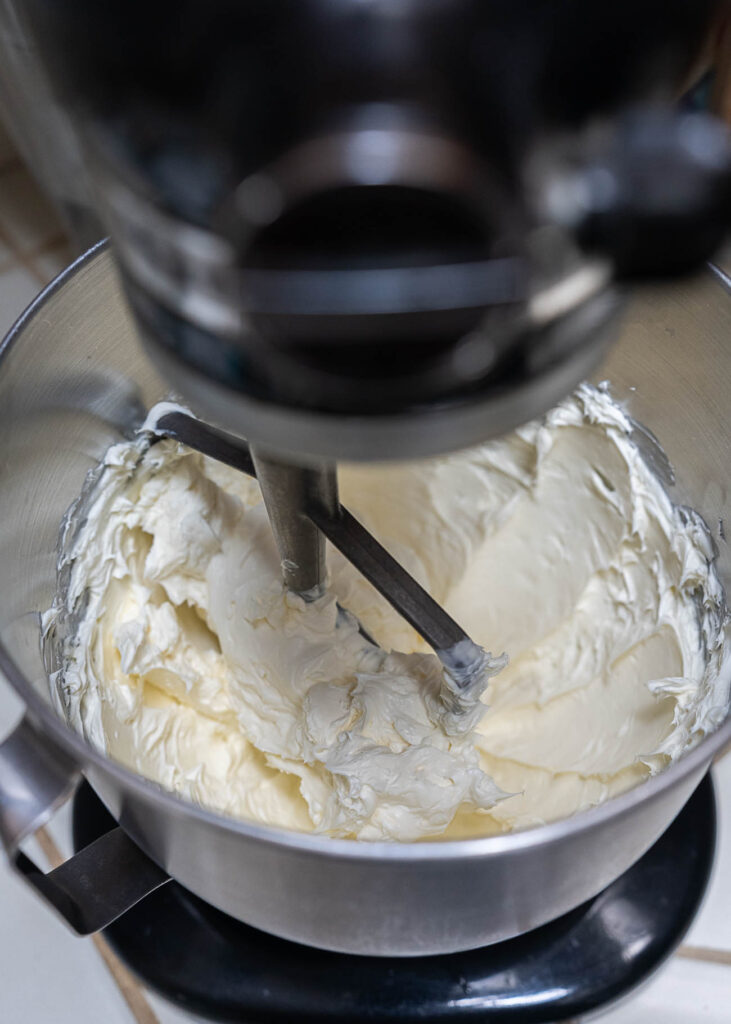
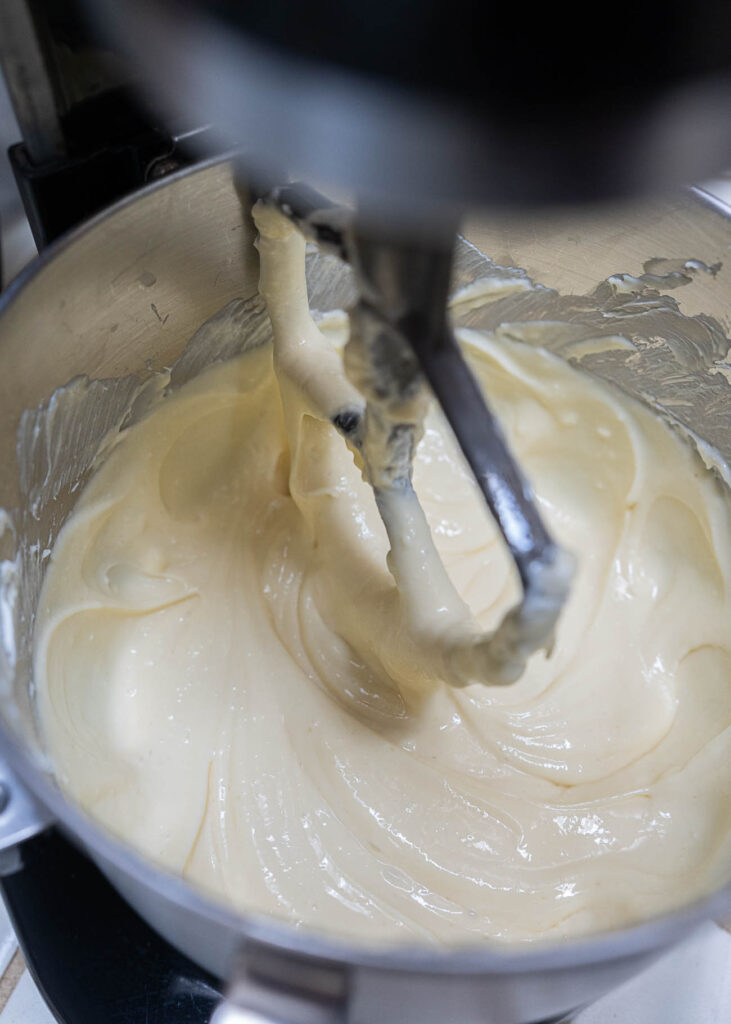
To the bowl of the stand mixer, add the cream cheese and vanilla. Using the paddle attachment, beat on medium-low for about a minute. Using a rubber spatula, scrape down the sides all around and then beat again for another minute until it is nice and creamy.
In a small bowl, combine the flour, sugar, and salt. Add it to the cream cheese mixture and mix until combined.
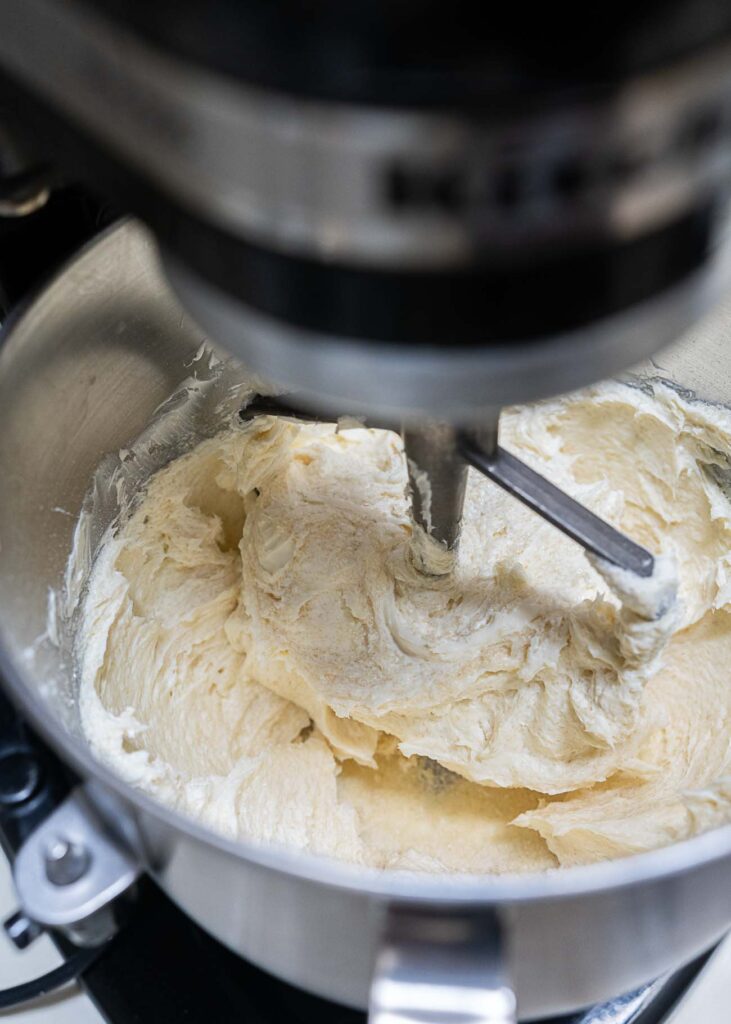
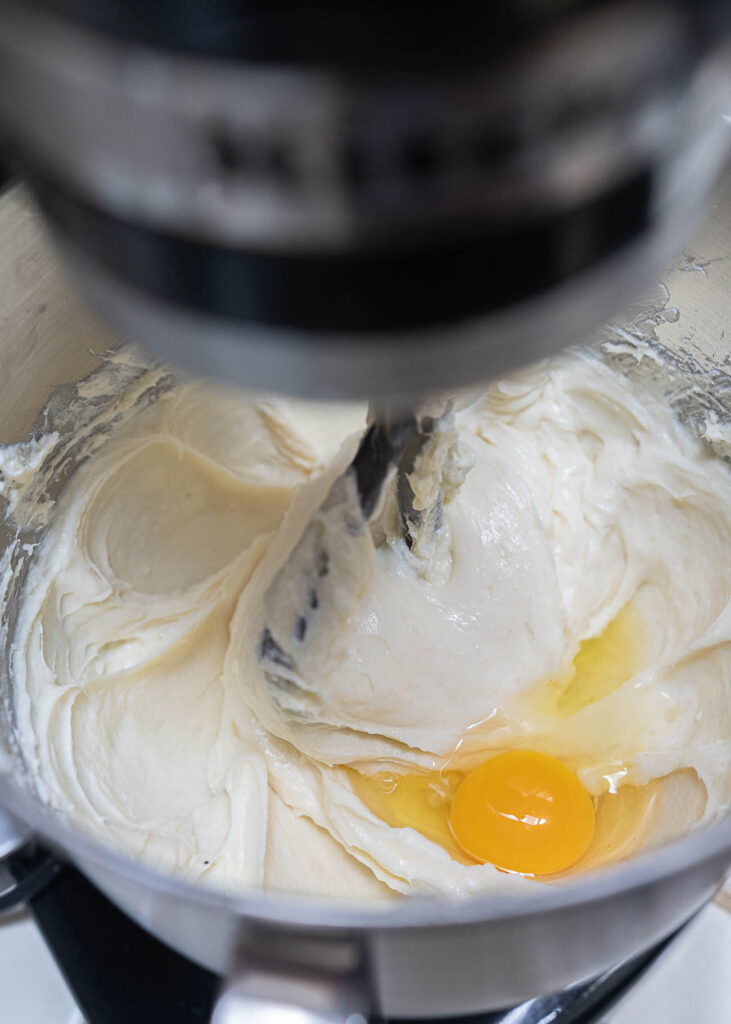
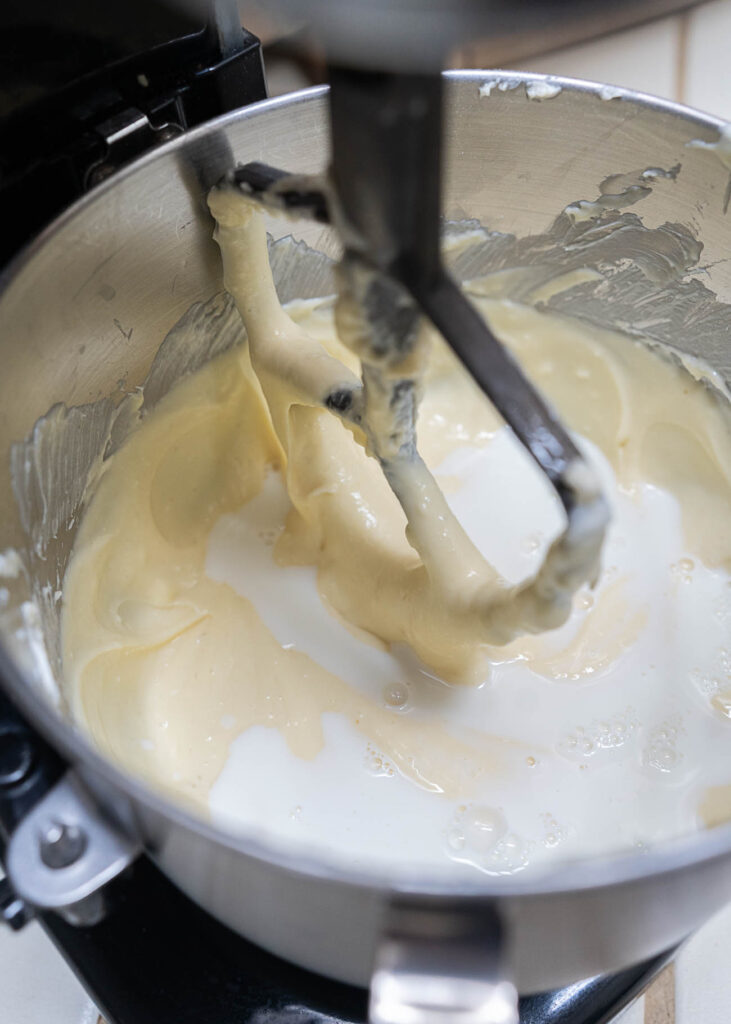
Next, add the eggs and egg yolk, one at a time, mixing between each addition. Scrape down the sides as needed with a rubber spatula.
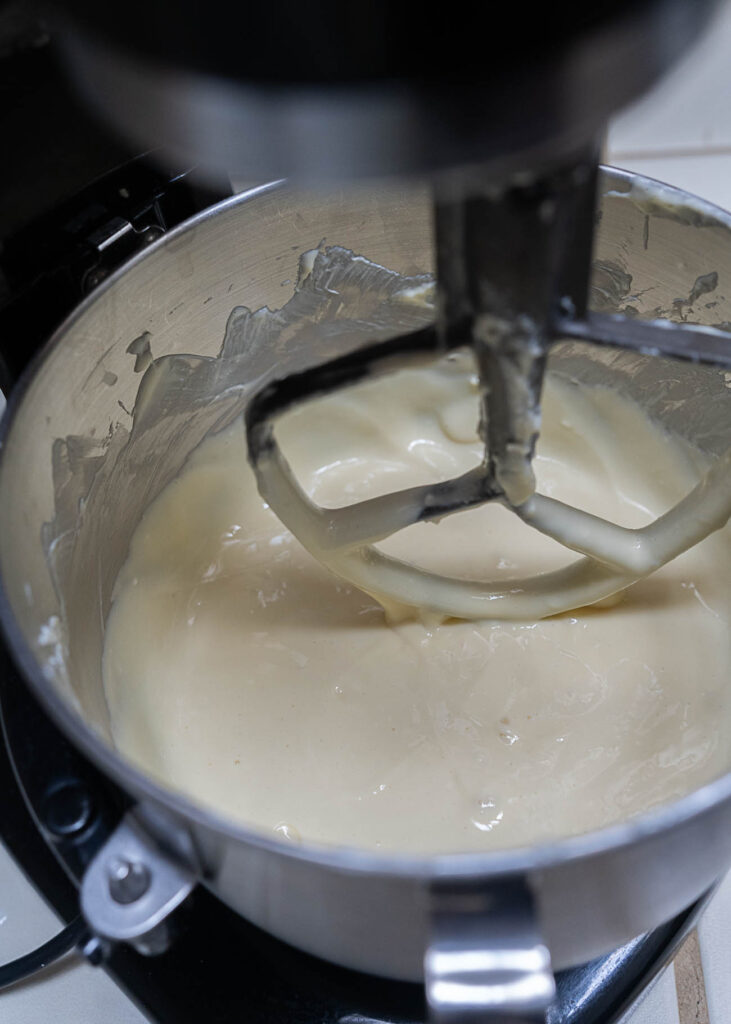
Lastly, stir in the milk. Scrape the sides all the way down to the bottom. If needed, lift the paddle attachment off and use it to scrape the bottom of the mixer bowl to be sure everything is creamy with no lumps.
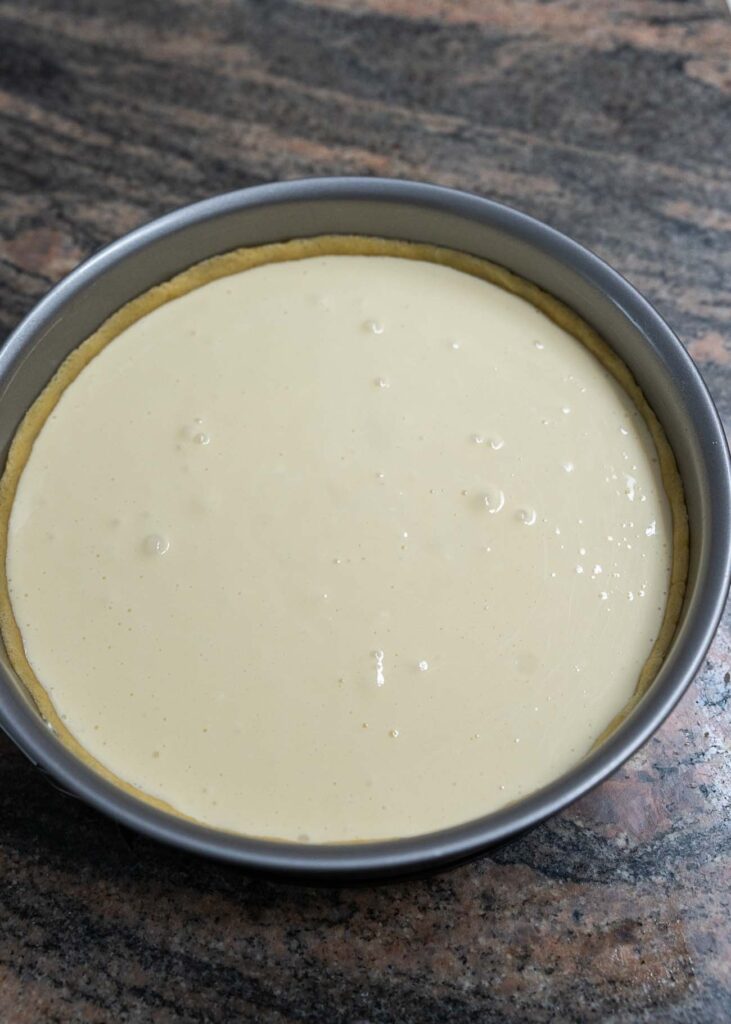
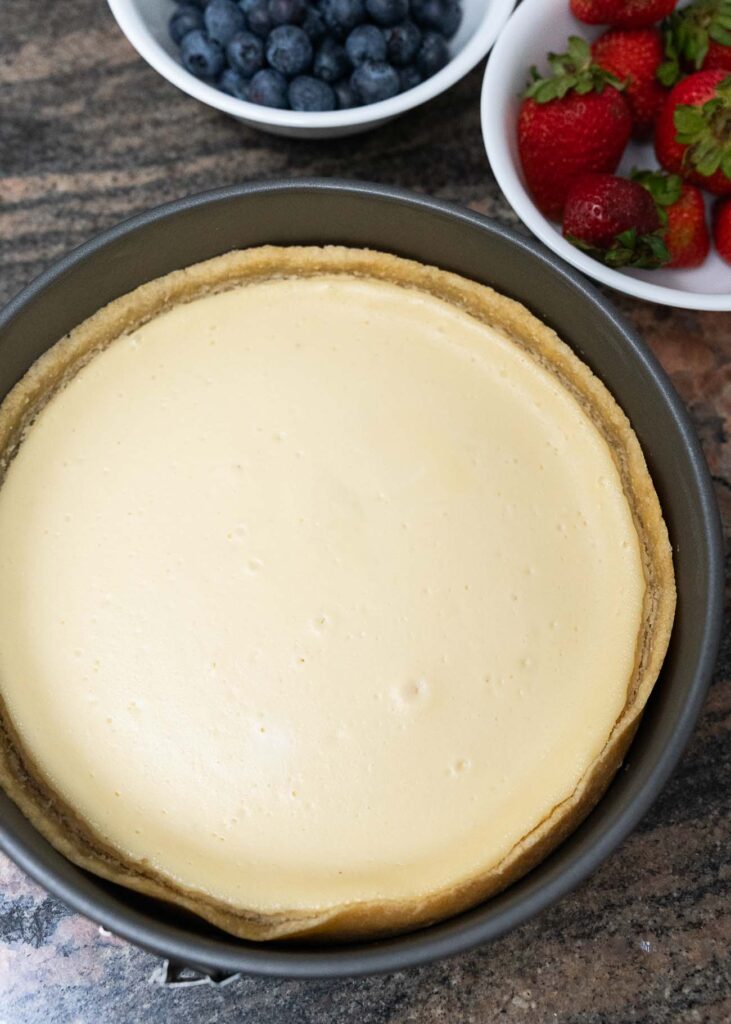
Finally, pour the cheesecake batter into the prepared crust.
Bake the cheesecake at 250 degrees for 1.5 hours. Turn off the oven and open the door partway and set the timer for another 30 minutes.
After those 30 minutes are up, carefully remove the cheesecake from the oven and set it on a wire rack to cool completely. Using a thin knife or spatula, loosen the crust from the side of the springform pan.
Cover with plastic wrap and refrigerate at least 3 hours or overnight. This is a great dessert to prep the day before, or up to 3 days before!
When you are ready to serve the cheesecake, remove it from the fridge, and carefully remove the sides. (If needed, use a thin knife to help release the crust from the sides before removing.)
Now it’s time to decorate!
How to Decorate the Cheesecake for 4th of July or Memorial Day:
Gather your washed and dried berries, and have fun decorating a patriotic cheesecake! You might try flag design, a star design, or simply pile up red and blue berries with little flags throughout.
To make a star, begin by placing the 5 points with blueberries around the edges. Then work your way inward until the sides meet.
Try filling in the middle with more blueberries, chopped strawberries, or even raspberries.You could also put a layer of jam down first before the fruit, for extra fruity flavor.
Try adding small American flags, sprigs of mint, or grated lemon peel as well. Have fun and get creative with it.
How to Store the Summer Berry Cheesecake
This cheesecake can be stored in the fridge for 3-5 days. If possible, store it before decorating, as the berries will not last as long as the cake.
If you would like to freeze leftover cheesecake, slice it and place small sheets of parchment paper between the slices. Place in the freezer for a couple of hours. Once it is firm, remove and individually wrap each piece of cheesecake first in plastic wrap, then in a freezer bag.
Homemade cheesecake can be frozen for 2-3 months.
When ready to eat, allow it to thaw in the fridge before serving.

Summer Berry Cheesecake Recipe
Equipment
- 9" Springform Pan
- Kitchen Aid Mixer
- mixing bowls
Ingredients
Crust Ingredients
- 3/4 cup all-purpose flour
- 3 tbsp sugar
- 1/2 tsp lemon zest
- 1 egg yolk lightly beaten
- 6 tbsp butter
- 1/4 tsp vanilla
Cheesecake Filling
- 3 pkgs cream cheese softened
- 1 cup sugar
- 2 tbsp flour
- 1/2 tsp lemon zest
- 1/4 tsp salt
- 2 eggs
- 1 egg yolk
- 1/4 cup milk
- 1/2 tsp vanilla
Berries for Decorating
- Your choice of berries for topping/decorating
Instructions
Make the Crust:
- Preheat the oven to 350 degrees F.
- In a small bowl, combine the flour and sugar, and lemon zest.
- Cut the butter into small cubes, then, using a pastry cutter or your fingers, crumble the butter into the flour mixture until even crumbs form.
- Stir in the egg yolk and vanilla.
- Using a spoon or your hands, bring the dough together until it forms a ball.
- Take 1/3 of the dough ball and pat it out evenly onto the bottom of the springform pan (keep the sides off the pan for now). If needed, use slightly more than 1/3, but it should be enough to form a thin, even layer across the pan.
- Place the bottom crust into the oven and bake for 7 minutes.
- Remove the bottom crust and set it on a rack to cool. Reduce the heat to 250 degrees F.
- When the bottom crust has cooled, attach the sides to the springform pan.
- Pat the remaining dough onto the sides of the pan to a height of about 1 1/4 inches. It should meet the cooled bottom crust and press evenly up the sides all around. (see tips and photos above for how to do this neatly.)
- Set aside while you prepare the filling.
Make the Cheesecake Filling:
- In the bowl of a stand mixer, combine the 3 packages of cream cheese (24oz total), and vanilla.
- Beat with the paddle attachment for 2-3 minutes until fluffy, using a spatula to scrape down the sides once or twice to get it nice and creamy.
- In a small bowl, combine the sugar, flour, lemon zest, and salt.
- Beat the flour mixture into the cream cheese mixture, mixing well.
- Add the eggs and the yolk one at a time, beating at low speed until just combined.
- Stir in the milk.
- Unhook the paddle and scrape it around the bottom or use a spatula to make sure everything is nice and creamy with no lumps.
- Pour the filling into the prepared cheesecake pan
Bake the Cheesecake:
- Bake the cheesecake at 250 degrees F for 1.5 hours.
- Turn off the oven, open the oven door slightly, and let sit for another 30 mintues.
- Remove and place on a wire rack to cool completely.
- Using a thin knife or spatula, carefully loosen the crust from the side of the pan.
- Once the cheesecake has completely cooled, cover with plastic wrap and place in the fridge. Chill well for at least 3 hours or overnight.
- When ready to serve, carefully remove the sides of the pan and place on a plate or cake stand.
Decorate the Cheesecake
- Wash and gently pat dry your choice of berries.
- Decorate the cheesecake as desired.
- Slice and serve. Enjoy!
Notes
Looking for More Show-Stopper Dessert Recipes?
You might enjoy:
Easy and Beautiful Pumpkin Cheesecake